
Italia Carpet Tile Series
![]()
We are pleased to introduce our new line of Carpet Tile – We have added our carpet tile Italia Series to our growing product lines at 4 Corners.
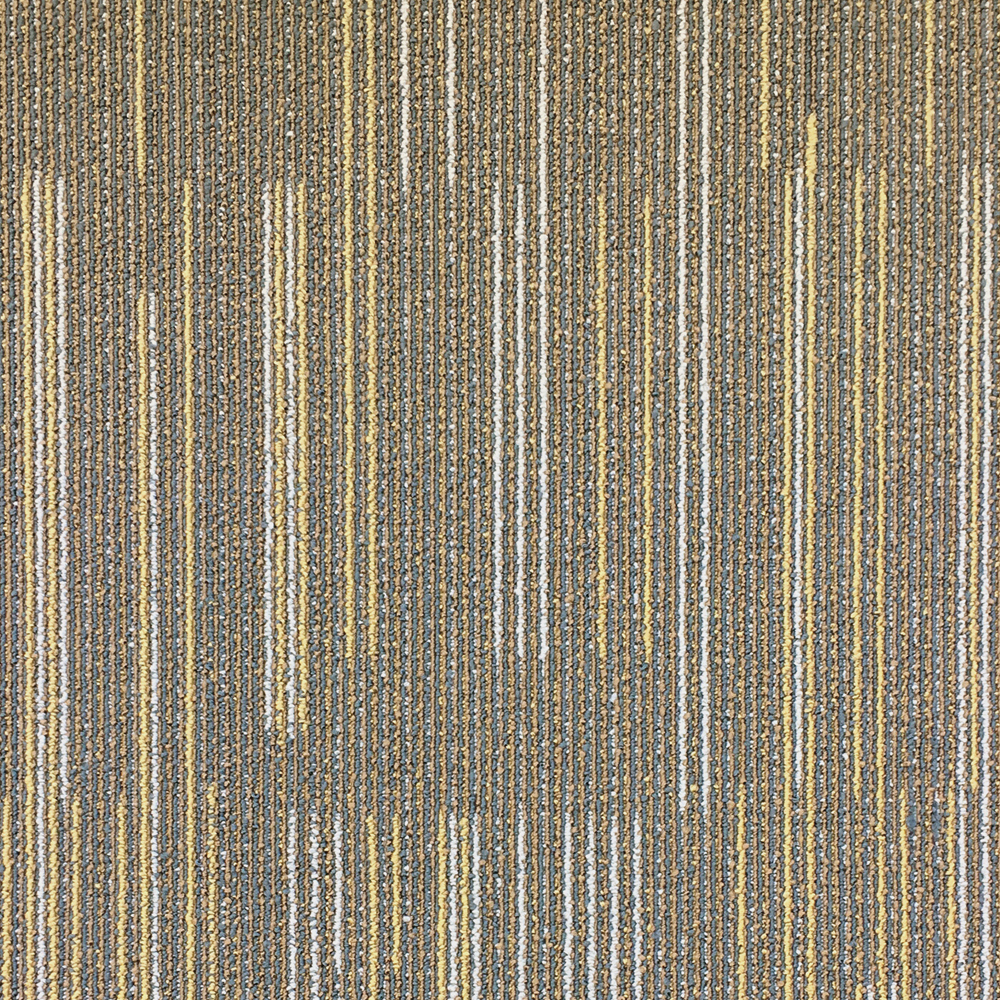
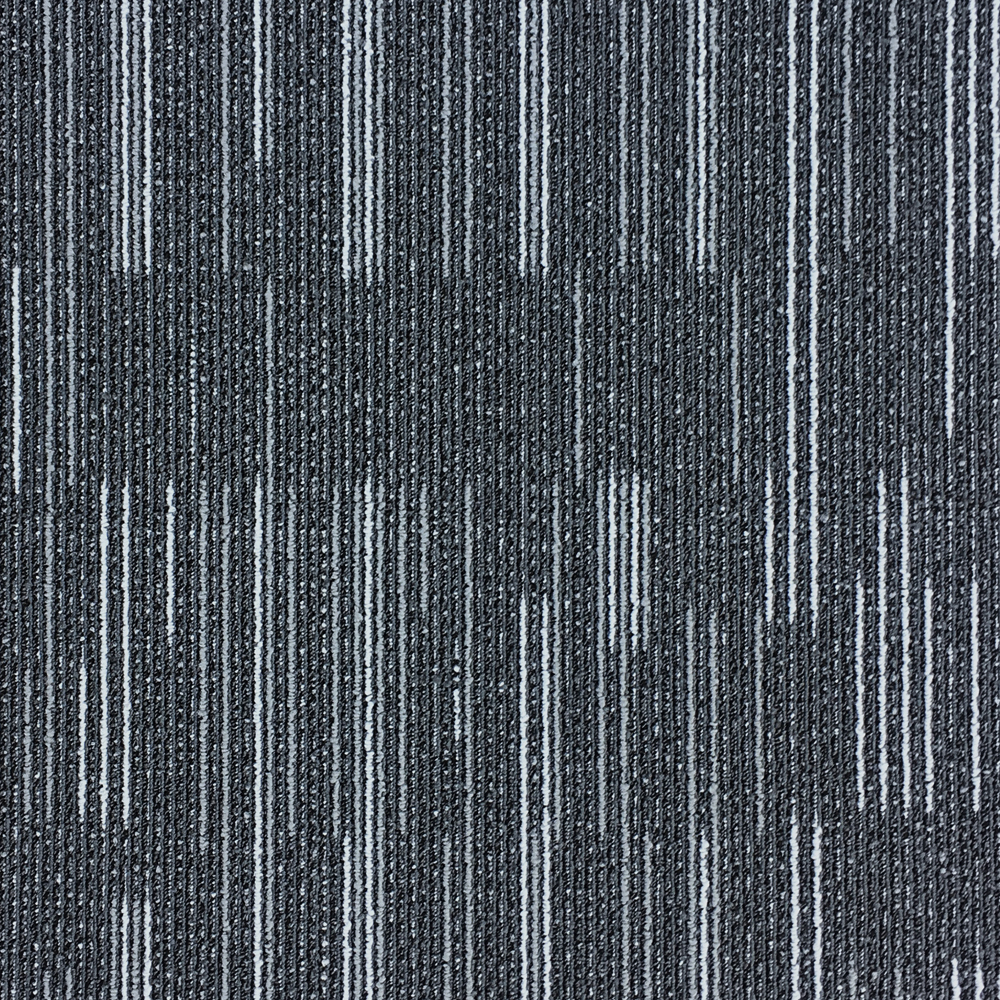
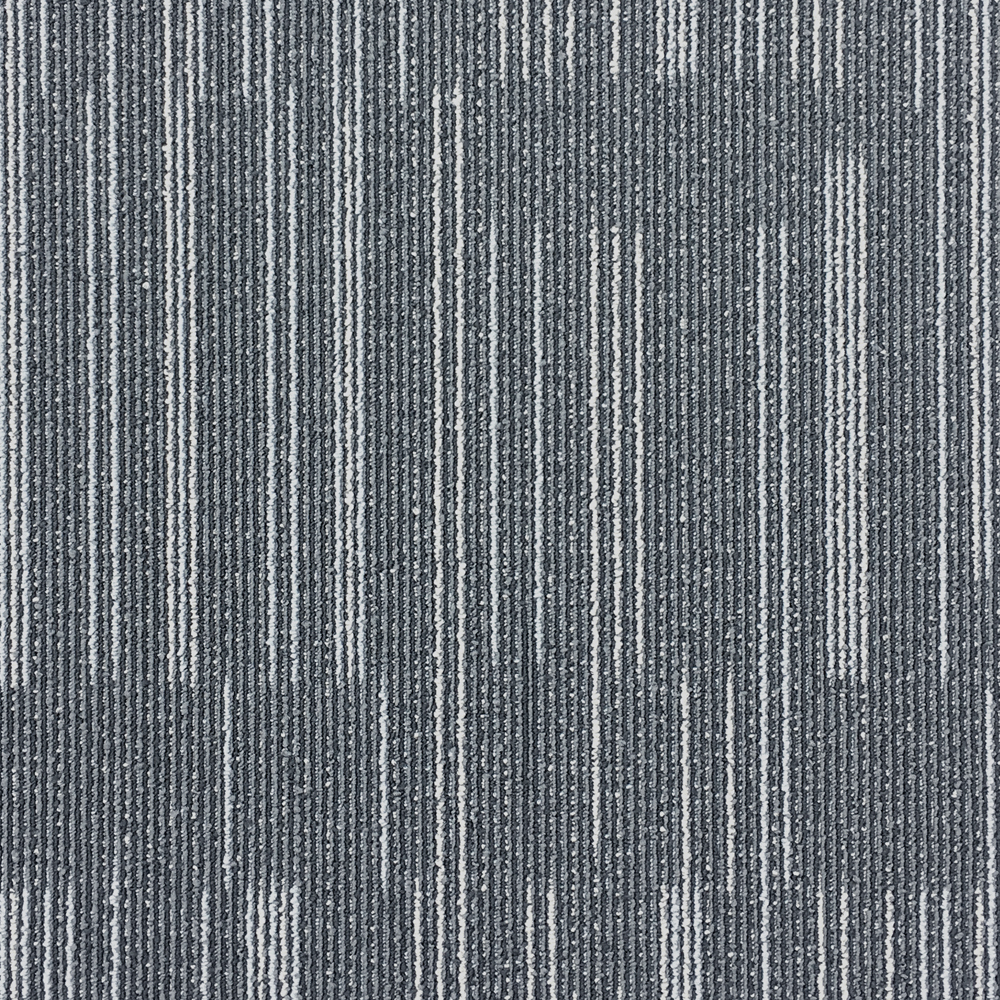
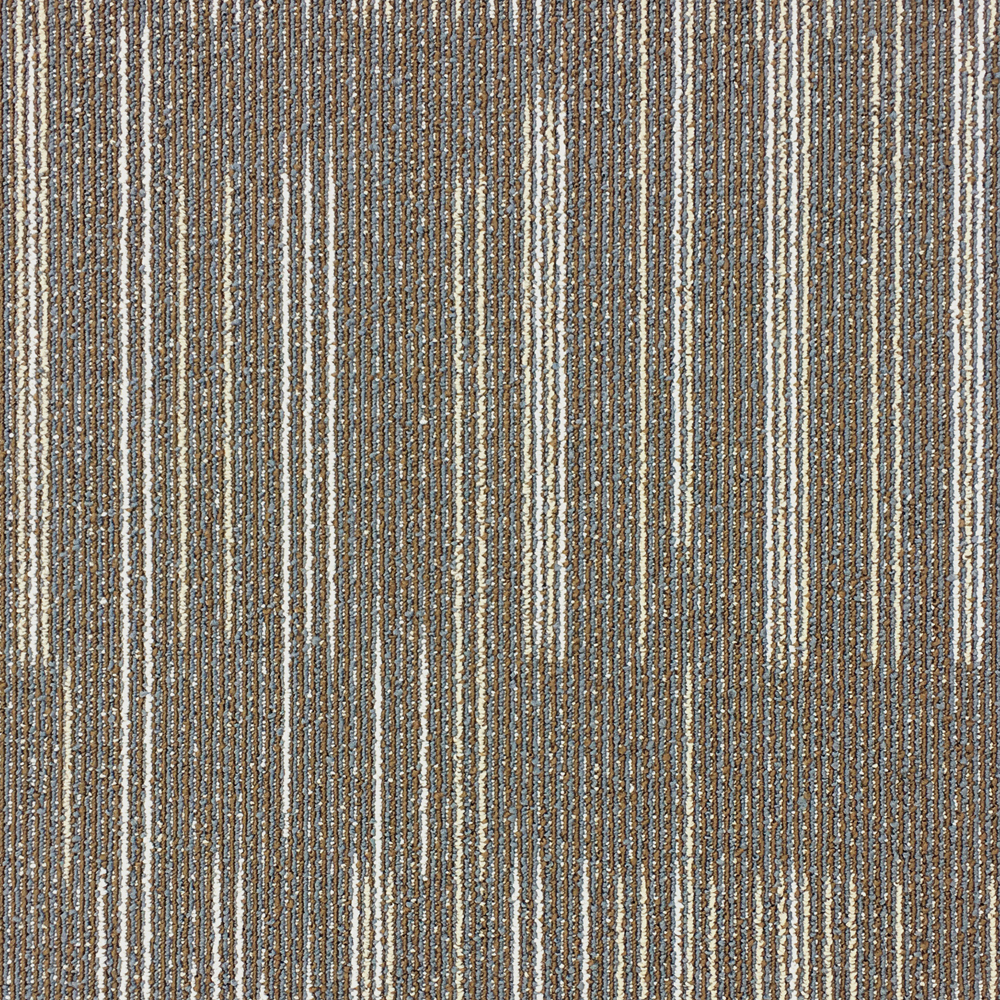
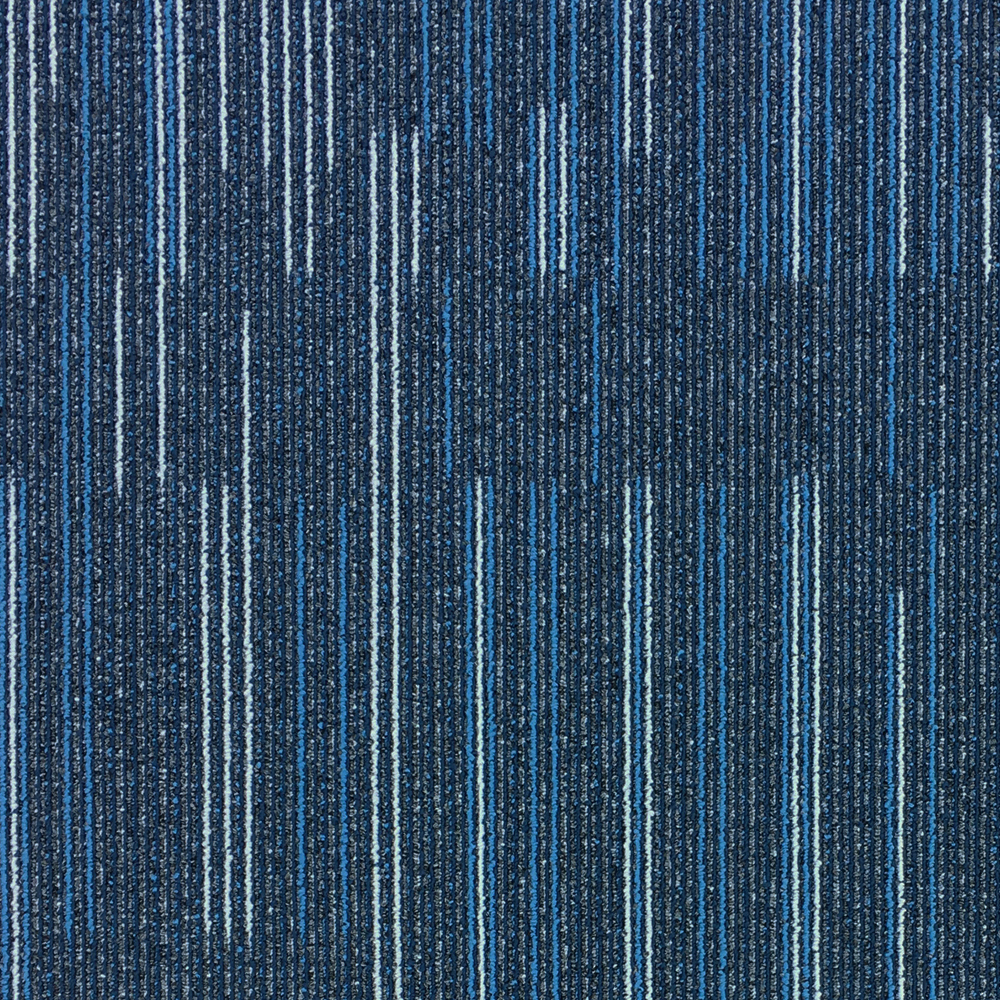
Our quality multi-level, solution-dyed Italia Series is made with a superior Nylon surface with a PVC backing showcasing a luxurious 20.5 pile weight and feels rich but at an affordable price for all budgets. 5 designer selected colours and patterns have been selected that will complement any decor. The names of this series and it’s colors were selected to recreate the uniqueness of the Italian landscape. Ciao Italia!

- Pile Weight: 20.5 oz
- Carpet Size : 19.68 x19.68″ / 50cm x 50cm
- Pallet Dimensions: L 4″ x W 4″ x H 5″
- Construction: Multilevel loop/Solution Dyed
- Face (Fibre/Back): Nylon/PVC
- Quantities:
- Box: 53.82 sqft/box 20 tiles per box
- Pallet: 1938 sqft 36 boxes per pallet
- Weight:
- Box: 55 lbs. (25 kg)
- Pallet: 1980 lbs (898 kg)
- Gauge 1/12th
- Warraty: 25 years Residential, 15 years Commercial
Why Choose Carpet Tile?

Affordability and Time Efficiency
Carpet tiles are generally less expensive than broadloom carpets on a square-foot basis, which can make them more affordable to purchase. Additionally, carpet tiles can be a more cost-effective option when it comes to installation, as they are generally easier and faster to install. This can save on labor costs and reduce the amount of time required to complete the installation process.
Carpet squares are easy to remove and replace
In a high-traffic environment such as an office space or a restaurant, wear and tear over time is inevitable. A major advantage of carpet tiles is that they can readily be replaced individually rather than replacing an entire floor.
Design Variability
Carpet tiles are a versatile choice that can be customized to suit any design aesthetic. Additionally, because carpet tiles are installed in individual squares, it is possible to create different patterns and designs using different colors or textures. This means that designers can create custom patterns and designs that can be tailored to fit the specific needs of a space.
Italia Carpet Tile Series Installation
Quarter-Turn Installation:
In the Quarter-Turn Carpet Tile Installation Method, the carpet tiles are installed in neat rows and columns, but each tile is rotated 90-degrees compared with the tile before it.
This is a popular installation choice for plain colored tiles, as it adds a subtle – but still noticeable – pattern.
Monolithic Installation:
In this method, all the tiles are installed in the same direction, next to each other, thereby, creating a seamless look. This is best suited for large spaces, as it creates a clean, uniform appearance.
The Vertical Ashlar Installation Method:
The carpet tiles are laid in a pattern that resembles the look of bricks stacked in a vertical direction. In this installation method, the tiles are installed in an offset pattern, with the vertical edges of each tile aligned with the center of the tile above and below it.
To achieve this look, the first row of tiles is installed with the vertical edges aligned, and the second row is installed with the tiles offset by half a tile length. This creates a “staggered” look that resembles the pattern of bricks in a wall.
The Horizontal Ashlar Installation Method:
In this installation method, the tiles are installed in an offset pattern, with the horizontal edges of each tile aligned with the center of the tile next to it.
To achieve this look, the first row of tiles is installed with the horizontal edges aligned, and the second row is installed with the tiles offset by half a tile length. This creates a “staggered” look that resembles the pattern of bricks in a wall, but with the tiles laid out horizontally.
The Checkerboard Installation Method:
In this installation method, the tiles are installed in a grid-like pattern of alternating colors or textures.
The checkerboard carpet tile installation method is a popular choice for creating a bold, graphic look in commercial and residential spaces. It works particularly well with tiles that have a distinct pattern or texture, as the alternating rows emphasize the individual tiles. This installation method can also make a room appear larger by drawing the eye outward, and it adds a sense of movement and interest to the space.


1. Remove the Furniture: For an easier installation process, move all furniture out of the space before you begin. Large pieces can be placed in hallways or spare rooms. It also has the added benefit of letting you start fresh with decoration and arrangement once the project is complete.
2. Remove the Old Flooring: Begin by removing any existing flooring that is in place. This will allow you to get to the subfloor, which can then be properly prepared. How you remove old flooring will depend on what it is made of. Removal can be a fairly labor-intensive job, requiring a pry bar or floor scraper. Flooring that was glued down with adhesives can be especially difficult to remove.
3. Fill Cracks and gaps in the subfloor: The subfloor and underlayment beneath carpet tiles must be completely flat since any variations will be felt underfoot through the carpet tiles. Even relatively minor dips or peaks can pose a tripping hazard. Allow the filler to dry overnight, and then use a putty knife to scrape away any excess until you achieve a smooth, flat surface. With plywood subfloors, you can use wood putty or floor leveler to fill gaps and repair cracks. A floor leveler is applied with a trowel, then allowed to dry to a smooth hard surface. You can also sand the floor lightly to remove any splinters or other dimensional features that may exist on”‹ the surface of a wooden subfloor.
4. Clean the Surface: Once the surface is flat, make sure that it is completely clean and free of any dirt, debris, or small particles. This is both for sanitary reasons and to ensure that carpet tile adhesive forms the strongest bond possible. Make sure not to use too much moisture for washing or rinsing. The floor will have to be completely dry before installation.
5. Seal the Subfloor: Concrete, wood, and most other subfloor materials are naturally porous, which makes them very susceptible to water. If the liquid can seep down into them, it can cause the growth of mold and mildew, while also warping and degrading the integrity of the structure. Unfortunately, carpet tiles are generally porous as well, and if a spill occurs, the moisture will quickly pass right through them, giving them a clear path to the surface below. That is why it is important to use a quality sealer to prevent damage. With concrete, use a sealer specifically designed for concrete. Wood is best sealed with a coat of polyurethane. Sealants can be applied using a paint roller and a metal tray, or concrete sealer can be sprayed on using a water bottle or aerosol can. Generally, one or two applications will be enough. When complete, wait at least an hour for the sealer to dry.
-
Prepare the subfloor: Ensure that the subfloor is clean, dry, and level. Remove any debris or adhesive residue, and repair any cracks or uneven areas.
-
Plan the layout: Plan the layout of the carpet tiles, taking into consideration the orientation, pattern, and size of the tiles, as well as any design features or obstacles in the room.
-
Cut the tiles: Use a sharp utility knife to cut the tiles to fit around the edges of the room or any obstacles. Ensure that the tiles are cut accurately and neatly.
-
Apply the adhesive: Apply a pressure-sensitive adhesive to the subfloor using a trowel or roller, following the manufacturer’s instructions for coverage and application. Cover the area sparsely, a little at a time, stopping periodically to put tiles in place so that the adhesive doesn’t have a chance to dry.
-
Install the tiles: Starting at the center of the room, lay the tiles in the desired pattern, pressing them firmly into the adhesive. Work your way outward from the center, using a chalk line or straight edge to ensure that the tiles are aligned properly.
-
Cut and install edge tiles: Cut the tiles to fit along the edges of the room, using a straight edge and utility knife. Install these tiles along the walls or baseboards, ensuring that they fit snugly and securely.
-
Allow the adhesive to dry: Allow the adhesive to dry completely, following the manufacturer’s recommended drying time.
-
Trim excess fibers: Trim any loose fibers or threads from the edges of the carpet tiles using a pair of sharp scissors.
-
Clean and maintain: Regularly clean and maintain the carpet tiles, using a vacuum or carpet cleaner as needed.
The frequency of cleaning must be based on the specific needs of trafficked areas within your facility or home.
1. Vacuuming: Grit and dirt if not vacuumed thoroughly, can become an abradant that could damage fibers if left in the carpet to build up. In addition to removing soil vacuum cleaning also enhances the appearance of the product by lifting and restoring the pile. Heavy traffic areas such as lobbies, entrances/exits, and barrier mats – particularly those exposed to various weather conditions – may require more frequent vacuum cleaning. Vacuuming these areas more regularly will help prevent soil from being trafficked into other areas.
2. Spot Cleaning: Use a clean cloth and work from the outer edge towards the centre of the spill to prevent spreading. Remove excess moisture using absorbent cloths, towels etc and protect the cleaned area until the carpet is completely dry. Do not over wet the carpet, or rub or agitate vigorously as this could distort or damage the pile and create lighter patches on the floorcovering. When/if you’re treating an oil-based stain, specific carpet spotters should be used. Check for any dye transfer to the cloth. If colour transfer has occurred, then do not use the solution. Otherwise, apply the spotter sparingly to a clean cloth and press the cloth onto the stain. Repeat the procedure until the stain has been removed and after any chemical treatment, the spot should be flushed out with water to remove any excess.
3. Deep Cleaning: For high-traffic areas and commercial enviornments, the deep cleaning of tile carpets should always be done by a professional carpet cleaner to ensure there is not too much moisture used in the cleaning process. Carpet tiles should be deep cleaned every 8 to 12 months depending on usage and soil build up.
Italia Carpet Tile Series Warranty
Residental
25 YEAR RESIDENTIAL LIMITED WARRANTY
Our 25 year Limited Warranty for ITALIA CARPET TILE SERIES means that for as long as you own your home, from the date of product purchase, your floor will be free from manufacturing defects and will not wear through or permanently stain from common household products when installed and maintained in accordance to manufacturer instructions (supplied with each product carton). This guarantee applies only to the original purchaser and proof of purchase is required for all claims. The guarantee is for the replacement or refund of the carpet tiles only and does not include labour or installation materials (i.e. glues, subfloors, tape, etc.). Claims for wear must show a minimum dime size area. If you wish to file a claim under warranty, please contact the authorized dealer where the flooring was purchased.
This warranty does not cover tears, burns, cuts, pulls or other damage, deterioration, problems or loss caused by abuse, neglect, misuse, improper installation, improper maintenance, flood, use on stairs, or use with athletic equipment, or installations over substrates where hydrostatic pressure or groundwater intrusion exists. This warranty does not cover any problems or damages arising from or related to the use of adhesives or non-recommended installation techniques or conditions.
Commercial
15 YEAR LIMITED COMMERCIAL WARRANTY
Our 15 Year Limited Commercial Warranty for ITALIA CARPET TILE SERIES means that for fifteen (15) years, from the date of product purchase, your floor will be free from manufacturing defects and will not wear through when installed and maintained in accordance to manufacturer instructions (supplied with each product carton). The guarantee is for replacement or refund of the carpet tiles only and does not include labour or installation materials (i.e. glues, subfloors, tape, etc.). Claims for wear must show a minimum dime size area. If you wish to file a claim under warranty, please contact the authorized dealer where the flooring was purchased.
This warranty does not cover tears, burns, cuts, pulls or other damage, deterioration, problems or loss caused by abuse, neglect, misuse, improper installation, improper maintenance, flood, use on stairs, or use with athletic equipment, or installations over substrates where hydrostatic pressure or groundwater intrusion exists. This warranty does not cover any problems or damages arising from or related to the use of adhesives or non-recommended installation techniques or conditions.
Our Warranty does not include the following:
- Dissatisfaction due to improper installation, maintenance, or irregularities caused by subfloor or existing floor.
- Damages due to stains, pulls, burns, cuts, scratches, indentations and other accidents or abuse.
- Problems or damages due to moisture, fungus, alkali or hydrostatic pressure in subfloor.
- Color shade variations from samples or printed illustrations compared to actual product.
- Installation of flooring over improper material: e.g. particleboard, chip wood, press board
- Installation in temperature ranges other than those in accordance with instructions.
- Gapping due to improper installation or adhesive shrinkage.
- Use with athletic equipment or installations over substrates where hydrostatic pressure or groundwater intrusion exists
- Damages arising from or related to the use of adhesives or non-recommended installation techniques or conditions.
We will not pay labor costs to repair or replace material with defects that were apparent before or at the time of installation. Inspection by an authorized representative may be necessary to verify the manufacturing defect exists, or you may be requested to submit samples of defective material to CDM Distribution Inc. If replacement is needed in accordance with this warranty and the defective material or pattern has been discontinued, CDM Distribution Inc. reserves the right to select and supply similar CDM Distribution Inc. replacement material. If a manufacturing defect is found, CDM Distribution Inc. should be notified promptly.

